
Last updated: June 24, 2026
Quick Answer: Winterizing a tiny house means protecting your plumbing, sealing air leaks, upgrading insulation, choosing the right heating system, and installing proper skirting — all before temperatures drop. A complete winterizing a tiny house checklist covers these five areas and takes most owners one to two focused weekends to complete. Done right, it keeps your home warm, your pipes intact, and your energy bills manageable all winter long.
Key Takeaways
- Pipe freeze protection is the single most urgent task — uninsulated water lines in a tiny house can freeze within hours in sub-freezing temps
- Continuous insulation (floor, walls, and roof) is non-negotiable in cold climates; aim for R-30 or higher in the floor and R-49 in the roof where possible
- Skirting around the base of a tiny house on wheels (THOW) dramatically reduces heat loss from below
- Propane, diesel, and mini-split heat pumps each have real trade-offs; the right choice depends on your climate zone and whether you're on-grid
- Air sealing matters as much as insulation — a well-insulated but drafty tiny house is still a cold tiny house
- Emergency prep (backup heat, water supply, and power) is part of any serious winterization plan
- Builders who specialize in cold climates build differently from the start — if you're still shopping, that matters
Table of Contents
- Why Winterizing a Tiny House Is Different From a Standard Home
- The Complete Winterizing a Tiny House Checklist
- Plumbing Freeze Protection: Your Highest-Stakes Task
- Insulation and Air Sealing: The Foundation of a Warm Tiny House
- Skirting Options for Tiny Houses on Wheels
- Heating Systems: Propane, Diesel, and Electric Compared
- Emergency Preparedness for Winter in a Tiny House
- Cold-Climate Builders Worth Knowing
- FAQ
Why Winterizing a Tiny House Is Different From a Standard Home
Tiny houses lose heat faster than conventional homes — not because they're poorly built, but because they have a much higher surface-area-to-volume ratio. More exterior wall per square foot of living space means more places for cold to get in. A tiny house on wheels adds another layer of complexity: the undercarriage is fully exposed to outside air, and most THOWs weren't designed with a Minnesota winter in mind.
The good news is that a small space is also easier to heat and seal. If you work through a solid winterizing a tiny house checklist systematically, you can make even a modest build genuinely comfortable in serious cold.
The Complete Winterizing a Tiny House Checklist
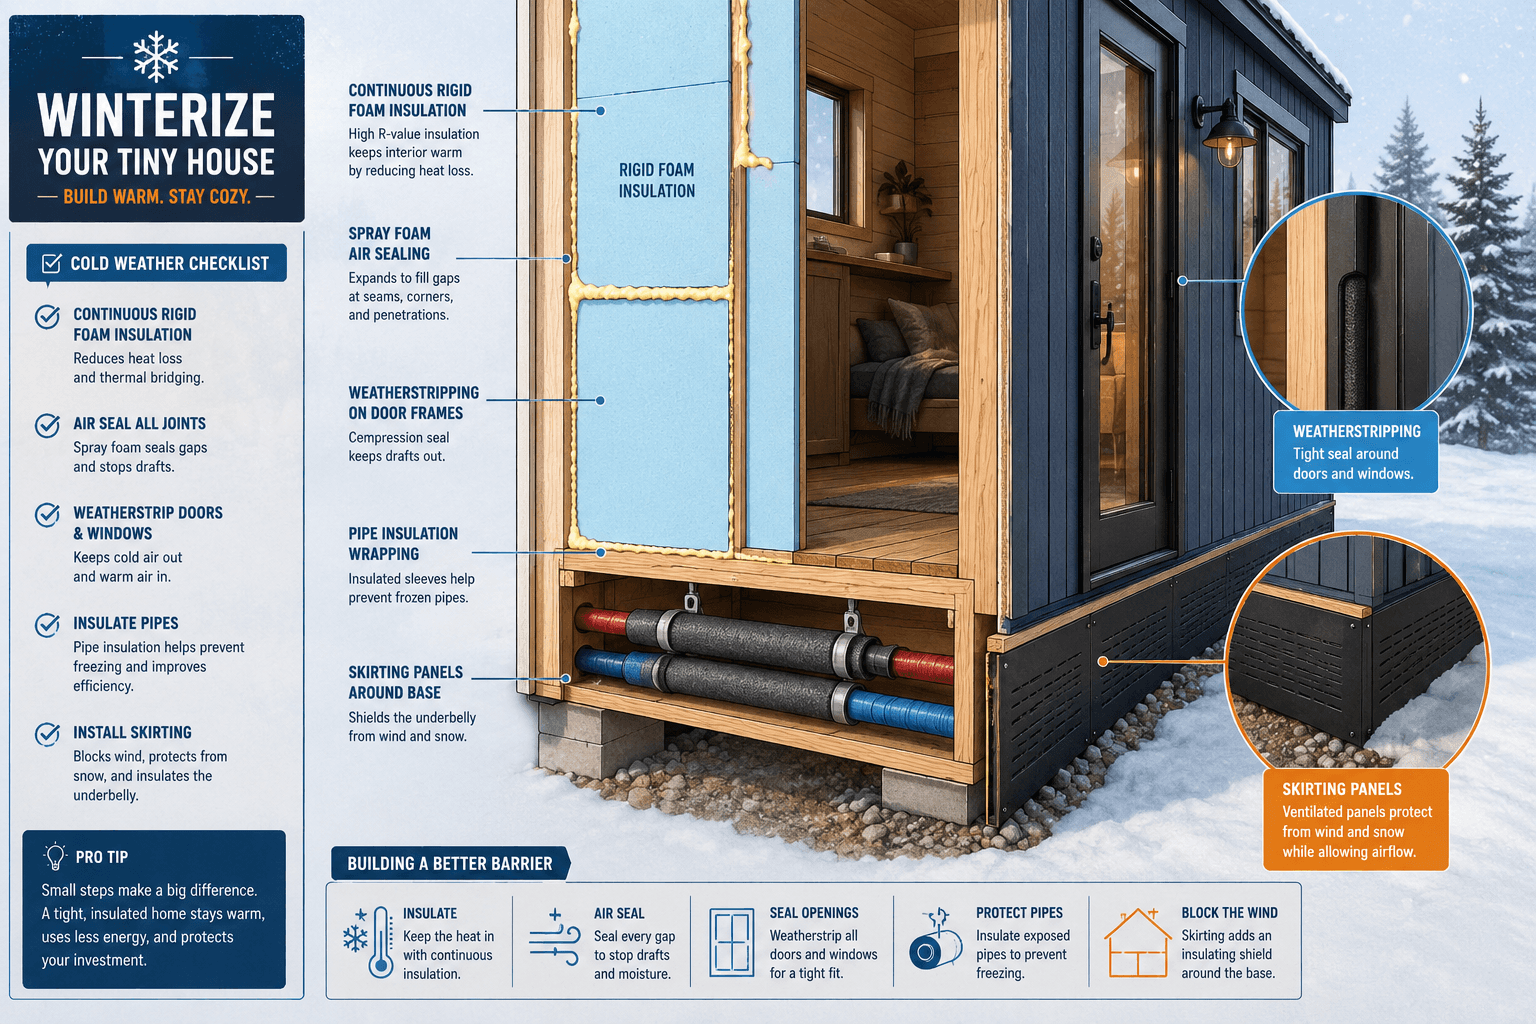
Use this as your master list. Check off each category before the first hard freeze in your area.
Plumbing
- Insulate all exposed water pipes with foam pipe insulation
- Install heat tape on vulnerable lines (especially under the floor)
- Know where your water shutoff is and test it
- Drain and disconnect outdoor hoses and spigots
- Consider a tankless water heater with freeze protection built in
Insulation and Air Sealing
- Inspect and upgrade floor insulation (R-30 minimum for cold climates)
- Check wall insulation continuity — no gaps at corners or window frames
- Seal penetrations (pipes, wires, vents) with spray foam or caulk
- Add weatherstripping to doors and windows
- Install thermal curtains on north-facing windows
Skirting
- Install skirting around the full perimeter of your THOW
- Choose a material rated for your climate (rigid foam, metal, or wood)
- Leave a small access panel for inspections and ventilation
Heating
- Service your primary heat source before cold weather arrives
- Install a carbon monoxide detector if using propane or diesel heat
- Confirm your heating system is sized correctly for your square footage
- Have a backup heat source ready
Moisture and Ventilation
- Check roof vents and exhaust fans for blockages
- Run a dehumidifier or ERV (energy recovery ventilator) to manage condensation
- Inspect the roof for any gaps or soft spots before snow loads arrive
Emergency Prep
- Stock at least 72 hours of water and food
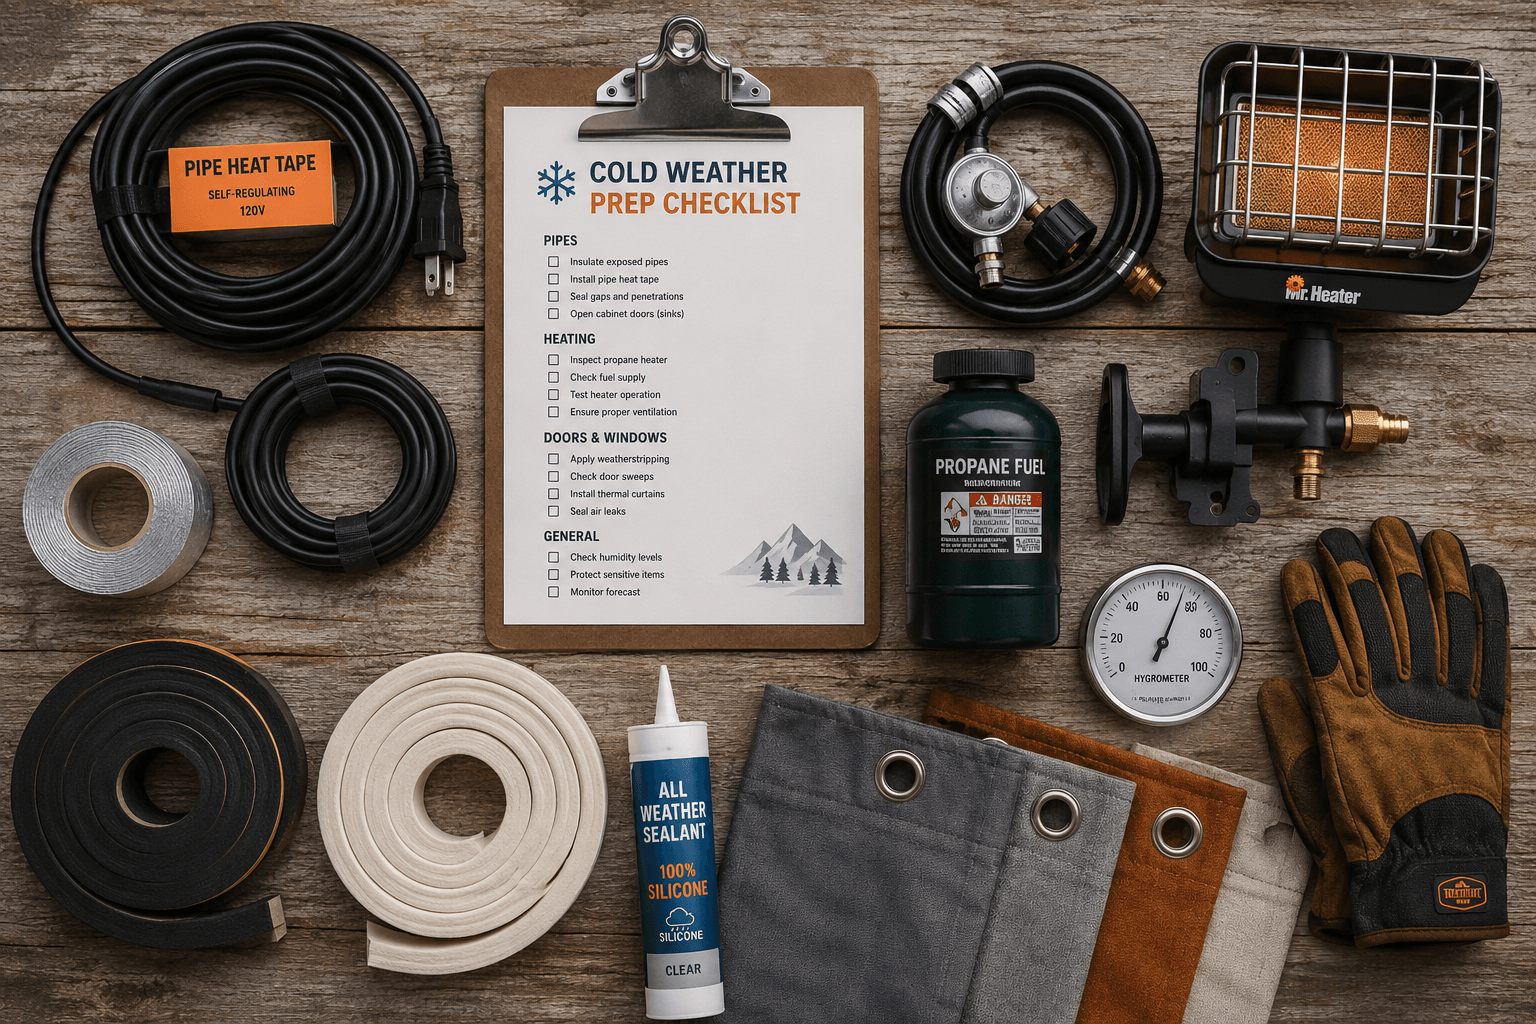
- Keep a backup propane canister or electric space heater on hand
- Know your nearest warming shelter if temps drop dangerously
Plumbing Freeze Protection: Your Highest-Stakes Task
Frozen pipes are the most common and most costly winter mistake tiny house owners make. Water expands when it freezes, and even a small crack in a PEX line can flood your interior in minutes once it thaws.
The core strategy has three parts:
- Insulate every exposed pipe with closed-cell foam pipe wrap, especially lines running through the floor cavity or along exterior walls.
- Heat tape (also called heat cable) is an electric heating element that wraps around pipes and keeps them above freezing. It's inexpensive and effective for the most vulnerable sections.
- Drip or drain when temps will drop below 20°F for extended periods. Letting a faucet drip slightly keeps water moving and reduces freeze risk.
If your tiny house uses a city water hookup, a heated water hose rated for winter use is worth every dollar. For off-grid setups, a well-insulated tank with a tank heater pad is the standard solution.
Common mistake: Insulating only the pipes you can see. The pipes running through your floor system, especially in a THOW with an open undercarriage, are often the first to freeze. Don't skip them.
Insulation and Air Sealing: The Foundation of a Warm Tiny House
In cold-climate tiny houses, insulation and air sealing are non-negotiable — not nice-to-haves. Cold-climate builders consistently stress continuous insulation across the floor, walls, and roof, with no thermal bridges and no gaps at transitions.
Target R-values for cold climates (Climate Zones 5-7):
| Assembly | Minimum R-Value | Recommended |
|---|---|---|
| Floor | R-25 | R-30 to R-38 |
| Walls | R-20 | R-25 to R-30 |
| Roof/Ceiling | R-38 | R-49 |
SIPs (structural insulated panels) are a popular choice among cold-climate tiny house builders because they provide continuous insulation without the thermal bridging you get with standard stud framing. Spray foam is another strong option for retrofitting an existing build.
Air sealing matters just as much as the R-value number. A tiny house with R-30 walls but gaps around window frames, pipe penetrations, and electrical boxes will still feel drafty and expensive to heat. Use canned spray foam for larger gaps and paintable caulk for smaller cracks. Pay special attention to where the floor meets the wall — that corner is a common cold spot.
If you're still in the builder-selection phase, look for builders who discuss their insulation strategy upfront. Builders like Rocky Mountain Tiny Houses and Tundra Tiny Houses operate in climates where cold-weather performance isn't optional, and their builds reflect that. You can browse more vetted options in our full builder directory.
Skirting Options for Tiny Houses on Wheels
Skirting closes off the open space between the bottom of your THOW and the ground. Without it, cold air circulates freely under your floor, making your heating system work harder and your feet colder.
Common skirting materials:
- Rigid foam board — Inexpensive, easy to cut, and adds real R-value. Works well in most climates. Not the most attractive option, but it can be painted.
- Metal panels — Durable and weather-resistant. Good for high-wind or high-moisture areas. Requires more installation effort.
- Wood (T1-11 or cedar) — Attractive and sturdy. Needs to be sealed against moisture, especially in wet climates.
- Insulated vinyl skirting — Designed for manufactured homes but works for THOWs. Easy to install and relatively affordable.
Whatever material you choose, leave a small access panel (at least 18 inches wide) so you can get under the house to inspect pipes, check for pests, and make repairs. Also leave some ventilation to prevent moisture buildup in mild weather.
For tiny houses in particularly harsh climates, some owners add a layer of rigid foam inside the skirting for extra protection — essentially creating a mini crawl space with real insulation value.
Heating Systems: Propane, Diesel, and Electric Compared
There's no single best heating system for a tiny house in winter. The right choice depends on your climate, whether you're on-grid, and how you use your space.
| System | Best For | Watch Out For |
|---|---|---|
| Propane (vented heater) | Off-grid, rural, moderate cold | Tank refills in deep winter; CO risk if unvented |
| Diesel (forced air) | Very cold climates, full-time living | Fuel storage, smell, higher upfront cost |
| Mini-split heat pump | Mild to moderate cold, on-grid | Efficiency drops below 15-20°F; needs backup |
| Electric resistance | On-grid, mild climates | High operating cost in serious cold |
| Wood/pellet stove | Rural, off-grid, supplemental | Weight, clearances, ash management |
Choose propane if you're off-grid or in a rural area where electricity is unreliable. A vented wall heater from a brand like Rinnai or Empire is efficient and reliable. Just make sure it's properly vented and you have a CO detector installed.
Choose a diesel heater if you're in a genuinely cold climate (think Montana, Minnesota, or the Upper Peninsula of Michigan) and you want serious heat output without relying on propane tank refills. Brands like Webasto and Espar are common in the THOW community.
Choose a mini-split if you're on-grid in a climate that stays mostly above 20°F. Modern cold-climate mini-splits (rated to -13°F) are efficient and provide both heating and cooling. They're a popular choice among builders like Tiny Houses of the Hudson Valley for builds in the Northeast.
Always have a backup. A small electric space heater or a backup propane canister can make the difference if your primary system fails during a cold snap.
Emergency Preparedness for Winter in a Tiny House
A tiny house in winter is more vulnerable to power outages and heating failures than a conventional home, simply because there's less thermal mass to hold heat. If your heater goes out at 2 a.m. in a THOW, the interior temperature drops fast.
Build a simple emergency kit:
- Backup heat source (battery-powered or propane space heater rated for indoor use)
- At least 72 hours of water stored inside (not in an exterior tank that could freeze)
- Extra blankets and sleeping bags rated below your expected low temp
- Flashlights, a battery-powered radio, and a fully charged power bank
- Contact information for a local plumber in case of a pipe emergency
If you're in a climate with serious winter weather, it's also worth knowing where the nearest warming center is. This isn't pessimism — it's the same practical thinking that makes tiny living work long-term.
For location-specific guidance on cold-weather tiny living, the Tiny Homes in Alaska guide covers some of the most extreme conditions you'll encounter in the US, and many of the principles apply anywhere with a real winter.
Cold-Climate Builders Worth Knowing
If you're still in the planning or buying phase, choosing a builder who understands cold-weather construction from the ground up saves you from retrofitting later. A few worth looking at:
- Tundra Tiny Houses — Built specifically for cold climates
- Rocky Mountain Tiny Houses — Experience with high-altitude, cold-weather builds
- Michigan Tiny House — Midwest winters demand serious construction
- Bear Creek Tiny Houses — Strong insulation and cold-weather detailing
You can also explore the full cold-weather tiny homes resource for more builder profiles and climate-specific guidance.
Conclusion
Winterizing a tiny house isn't complicated, but it does require working through the right checklist before cold weather arrives — not after. Start with your plumbing, because frozen pipes are the most expensive mistake to fix. Then work through insulation, air sealing, skirting, and your heating system. Finish with an emergency kit you hope you never need.
The winterizing a tiny house checklist in this guide covers every major category. Print it out, work through it section by section, and give yourself at least two weekends before your first expected freeze. If you're still choosing a builder, prioritize one with a documented cold-climate approach — it's far easier to build it right the first time than to retrofit later.
Start where you are. A small footprint and a full life are both possible in winter — you just need to prepare for it.
FAQ
How early should I start winterizing my tiny house? Start at least four to six weeks before your area's first expected freeze. That gives you time to order materials, make repairs, and address any surprises without rushing.
Can a tiny house on wheels stay warm in temperatures below zero? Yes, but it requires the right combination of insulation (R-30 or higher in the floor), a capable heating system (propane or diesel for very cold climates), full skirting, and pipe protection. Builds designed specifically for cold climates handle sub-zero temps reliably.
What R-value do I need for a tiny house in a cold climate? For Climate Zones 5 through 7 (think the upper Midwest, Mountain West, and Northeast), aim for R-30 in the floor, R-25 in the walls, and R-49 in the roof. These aren't absolute minimums — they're practical targets for comfortable winter living.
Is heat tape safe for tiny house plumbing? Yes, when installed correctly. Use heat tape rated for the pipe material you have (PEX, copper, or plastic), don't overlap the tape on itself, and plug it into a GFCI outlet. Most heat tape is thermostatically controlled and only runs when temperatures drop near freezing.
What's the best skirting material for a THOW in a snowy climate? Rigid foam board covered with a weather-resistant facing (like house wrap or thin metal sheeting) performs well in snowy climates. It adds insulation value, handles moisture, and is easy to cut to fit irregular terrain. Metal panel skirting is more durable but harder to install.
Do I need a carbon monoxide detector if I use propane heat? Yes, always. Any fuel-burning appliance — propane, diesel, or wood — produces carbon monoxide as a byproduct. Install a CO detector within 10 feet of your sleeping area and test it monthly. It's a non-negotiable safety item.
What if my tiny house is a foundation-built ADU, not a THOW? Most of this checklist still applies, but you can skip the skirting section. Focus on pipe insulation in any unconditioned crawl space, air sealing around the foundation, and making sure your heating system is properly sized. Check your state's ADU regulations — our tiny homes by state directory is a good starting point.